Taking a backup of your important files and media is very important as it may get lost because of various factors. If you want to make a backup copy of your favourite videos or movies for permanent preservation, then burning video files to a playable DVD would be an excellent option. Below will instruct you on how to burn videos to DVD in details.
First of all, you need to download and install Wondershare DVD Creator on your computer. And then simply follow the steps to burn your DVD.
Step by Step Guide on How to burn any video to DVD
1. Choose DVD Disc Tab
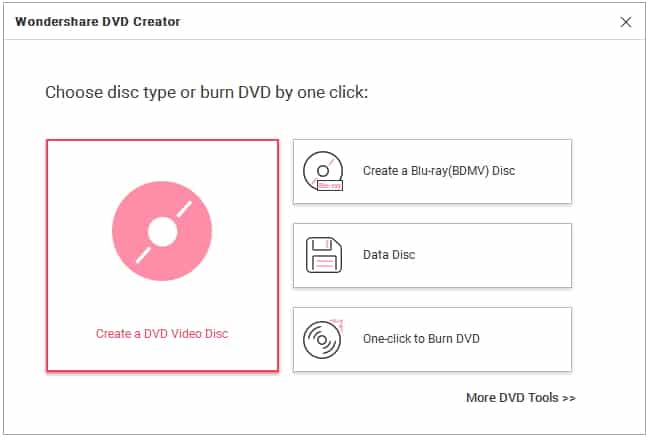
Launch Wondershare DVD Creator and choose disc type as the on-screen instruction requires. Here takes Create a DVD Video Disc for example.
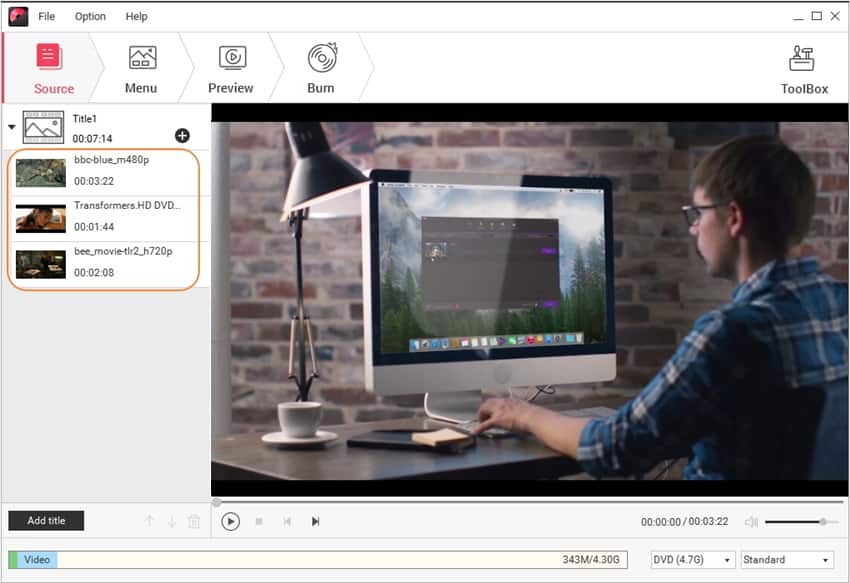
2. Import Videos to Wondershare DVD Creator
Click add file icon + under the Source tab to add MP4, AVI, MKV, MOV or any other video files that you want to burn to DVD format. Note that you can also direct drag and drop your desired videos

Then the program will display the loaded video thumbnails in the left together with the video name and length.
If you want to create a new Title page, just hit add title icon in the bottom-left side. Similarly, clicking import icon enables you to add videos to the Title.
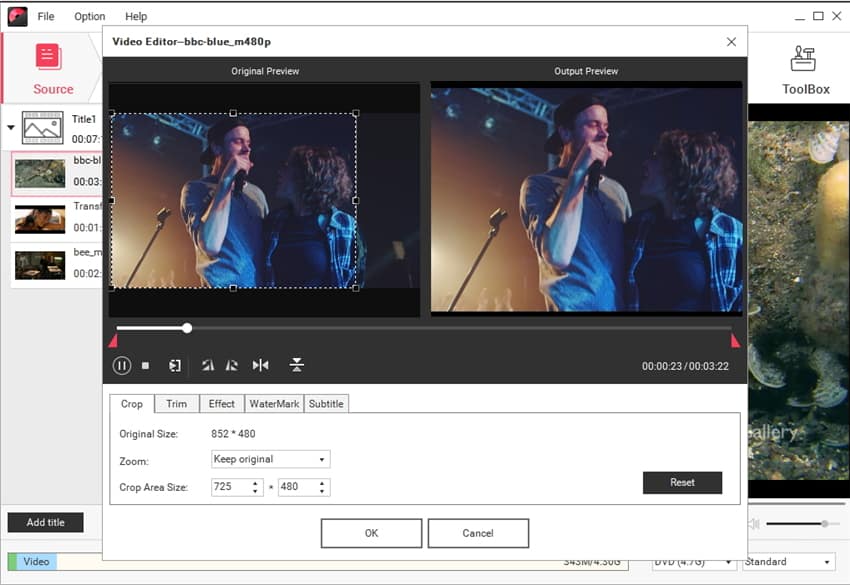
3. Edit Videos (Optional)
Move the mouse over the video thumbnail, there’ll be a pencil-like icon just as the screenshot shows.
Click edit icon and you’ll get the Video Edit window, where you can crop/enhance/trim video, add effect, watermark and subtitle as you wish. Visit Video Editor to learn how to edit video in detail.
If you want to change the video order, just select the video and click move up icon or move down icon. Alternatively, you can also right-click the video and choose to Move up or Move down to adjust the sequence.
4. Customize DVD Template & Menu
Click the Menu tab in the top, you can see the clear Menu Structure in the left and over 100 free DVD Templates in the right. Double-click the template thumbnail would change the default one to your liking.
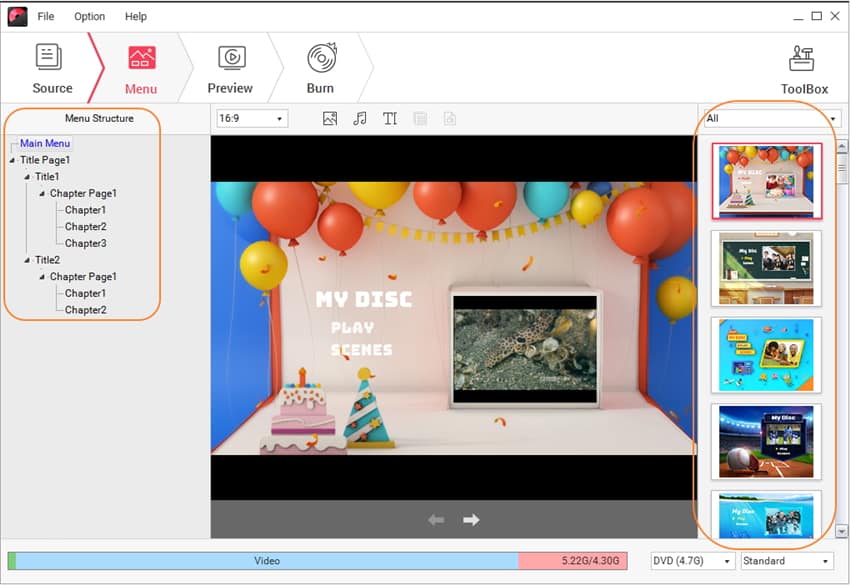
Click drop down icon to choose your favourite menu themes from the sport, travel to family. Wondershare DVD Creator provides you over 100 DVD menu templates for better user experience.
Apart from the DVD templates, there’re another 6 tricks that help to customize your DVD.
- Click switch icon to change the chapter frame.
- Click customize background icon to customize the background image.
- Click customize background music icon to add or edit background music.
- Click add text icon to add text to the main menu for necessary notes. Select the text box and you’ll be able to set the font size, colour, etc.
- Click customize thumbnail icon to replace the chapter thumbnail with other images.
- Click create chapter icon to create chapters. You can either manually insert chapter or set auto insert chapter based on your needs.
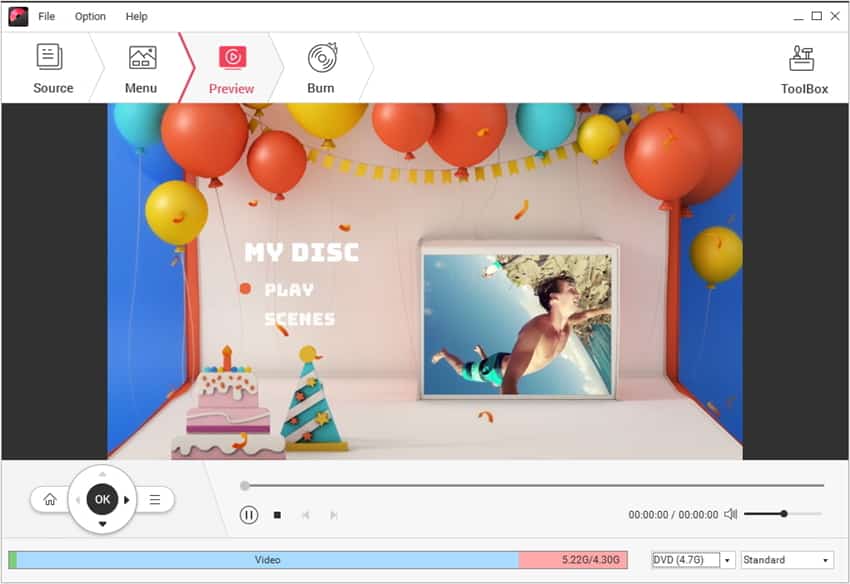
5. Preview DVD Slideshow
When finished, switch to the Preview tab to view your DVD creation. You can always go back to Source or Menu tab to make adjustments if you’re not that satisfied.
6. Burn MP4/AVI/MKV/MOV to DVD
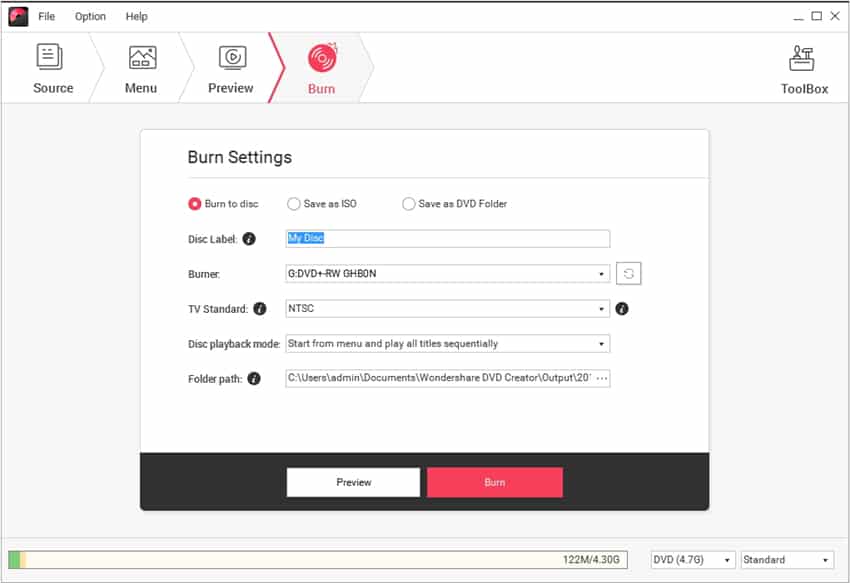
Once you’re satisfied with the DVD preview, proceed to the Burn tab and preset DVD settings as requested. After that, hit Burn to start burning video file to DVD right away.
That’s it. This way you can burn multiple videos to DVD media in order to preserve the backup. Here is the full video tutorial of same process.
from Technotification https://ift.tt/2Cznesu
via IFTTT
No comments:
Post a Comment